


Hunting with dogs is different than hunting without. Every aspect of the hunt, from making camp to strategizing for hunting on public land, must change to accommodate your canine companion.
For example, when prepping your first-aid kit, you must account for human- and dog-related medical emergencies. It’s not a question of if an accident happens, but when. A good hunter has a properly equipped hunting dog first-aid kit in his pack and at his camp or truck.

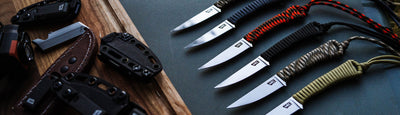
Anthony Ferro’s Hunting Dog First-Aid Kit
I carry a small hunting dog first-aid kit in the field for emergencies. The other, which I keep in my truck, is more comprehensive.
The field kit is meant to stop any bleeding and do preliminary treatment until we return to the truck. The truck kit can stabilize more serious injuries until we reach civilization.
When you’re out on the hunt, you may be over an hour away from the nearest vet. What do you do when your hunting companion sustains a life-threatening injury? Consider that very real scenario when you drop the tailgate.
Stocking Your Field Kit: The Most Common Injuries for Hunting Dogs
I pack light when I’m out in the field. As such, my field kit treats only the most common injuries dogs sustain (see below). My goal is always to keep my dogs calm, assess the situation, and administer any immediately necessary care so I can get them to safety as fast as possible.
Treating Cuts and Lacerations
The injuries I treat most often are cuts and lacerations from barbed wire and other sharp implements.
This usually happens in tall grass where dogs can’t see hidden barbed wire. They end up with injuries to their legs, chest, neck, and ears. The risk of your dog bleeding out from these cuts is significant.
Keep QuikClot and BleedStop in your hunting dog first-aid kit for situations like this. Water is also important for cleaning out wounds. QuikClot is a military-proven wound dressing designed to stop bleeding fast. BleedStop is a powder you pack right into the wound, and it’s great for areas where you can’t use QuikClot, such as deeper cuts or body cavities.
When your dog sustains an injury, stay calm. Freaking out will put stress on your dog and make its heart pump faster. Put latex gloves on, clean the wounds with water, and apply a tourniquet, if applicable. (Amazon sells high-quality tourniquets in inexpensive multipacks.)
Here’s an essential tip: Learn how to apply your dog’s tourniquet before you embark on the hunt. Applying a tourniquet incorrectly can cause injury or complications.
From there, use the QuikClot or BleedStop (or both — you may need to double up to stop the bleeding). Fill the wound with the gauze and/or powder, then apply pressure for several minutes until the bleeding stops. Ideally, this will be enough to keep your dog stable until you get back to your truck or campsite.
If you have a buddy to help with this part, that’s even better. It helps if someone else can keep the dog calm and stationary while you apply pressure.
A buddy can elevate your dog’s wound, as well, if it’s on a limb. Gravity is a good ally.
If your canine companion has minor cuts and lacerations that don’t require extreme treatment, try EMT Gel. EMT Gel is a collagen gel that heals and protects wounds — similar to super glue, but thicker. Apply it to your dog’s wound, then blow on it for five minutes. It’ll harden in the wound and keep it safe and germ-free.
Plain old superglue can also close wounds in a pinch. Many old-school bird dog hunters will tell you to throw some superglue on a wound to close it. I recommend EMT Gel for its antiseptic properties, though, especially since using superglue isn’t a medically endorsed practice.
When you return to your truck or camp, sanitize your dog’s wounds with Betadine. It’s a great antiseptic to keep in your larger hunting dog first-aid kit.
Use a medical stapler like this one to close the wound more securely, if necessary. Don’t keep the staples in for more than five days — leave them in only until you get to the vet. From there, use gauze or pre-wrap around the area to ensure your dog doesn’t lick it.
The bottom line is this: stop the bleeding, close the wounds, and get to the vet as quickly as possible. As long as you keep the wounds sanitized and closed, your dog’s life won’t be in immediate danger.
Treating Porcupine Quills
Don’t underestimate how often porcupines appear out on the hunt. After an attack, your dog will be in agonizing pain and may struggle to breathe.
To remove porcupine spines, I keep both curved and straight forceps, in large and standard sizes, in my pack and truck. (The large ones stay in my truck; the standard ones go in my pack.)
When a dog’s mouth is full of quills, curved forceps can reach behind the molars and front teeth. Use a small round dowel rod, about 8″–10″ long, to keep your dog’s mouth open. Place it between your dog’s back molars.
While wedging your dog’s mouth open this way will cause a little discomfort, it’s nothing compared to the pain the quills themselves inflict.
I’ve heard an old wives’ tale that you can cut porcupine quills in half to remove them easily. If your dog only has a few quills and the injury isn’t serious, you might want to try it.
Depending on your dog’s condition, you may not have time to cut quills or remove the ones on its face. Stop any bleeding first and remove any quills stuck in your dog’s throat or tongue to clear its airway.
Get your dog back to your truck once it’s stable, then get it to a vet as soon as possible. Give it a splash of water once you pull the worst of the quills out.
Many dogs will act like the porcupine encounter never happened once you remove the quills. Even so, get your dog to a vet and on antibiotics as soon as possible.
Keep an eye on your dog as you make your way to the vet and in the months after. Quills can break off and lodge in your dog’s skin. I often find quills we missed working their way out of my dog’s cheek months later.
Treating Poisonous Snake Bites
The 30 different species of venomous snakes in the U.S. live in 46 out of 50 states. I primarily deal with rattlesnakes, but you might not. Familiarize yourself with your area’s venomous species before heading out on the hunt.
When a bite happens, stay calm and work quickly. If your dog’s heart rate increases, the venom may spread through its system faster. The calmer you stay, the calmer your dog will stay.
Once you get back to your campsite or vehicle, keep your dog hydrated and cool. Snakes are most active in the warmer months, so placing your dog’s feet in cold water using a dog bowl or other container lowers their temperature on warm days.
Some dog owners advocate for antivenom; others are vehemently against it. The vets I’ve spoken to say it’s hit or miss, and the chance it’ll help is often only 20%–30%. However, I’ll take that 20% additional chance.
I’ve never had a dog die of a snake bite, but the ethics of treatment are up to you, the owner.
Treating Broken Bones and Sprains
Broken bones and sprains suffered on hunts aren’t usually life-threatening. Still, it’s important to remain calm and act swiftly but carefully.
Splinting your dog is the best (and only) step to take in the event of a break or sprain. If you can find a clear break, especially in the femur or tibia, look up how to make a splint with the supplies you have on hand. Keeping the bones in place may spare your dog excessive pain.

TL;DR: My Field Hunting Dog First-Aid Kit List
For those who want a quick TL;DR, here are all the items I keep in my hunting dog first-aid kit for field use. We reviewed some of them above; others are no-brainers:
- Two boxes (four total feet) of QuikClot
- Two packages (~30g) of BleedStop
- Curved and straight forceps with a standard needle nose
- One roll of pre-wrap
- One roll of vet wrap
- One roll of athletic tape
- One roll of Gorilla tape or duct tape
- A pair of dog boots (for when I’m in heavy shale and chukar country)
- One or two tubes of EMT Gel
- A bottle of saline solution (for wound and eye washing)
One more tip — I always keep a dog whistle in my field pack, too. When electronics fail, or when it’s too windy for my dog to hear me calling, I can always depend on a dog whistle.
TL;DR: My Truck Hunting Dog First-Aid Kit List
I keep more gear stocked in my truck than in my field kit. My truck holds a lot of duplicates, too — mainly extra gauze, bandages, saline, and wraps. I also keep my wound stapler, some good surgical scissors, and dog nail clippers in my truck.
I also keep an antibacterial spray called Bactine in the truck. It’s fantastic for keeping wounds sanitary, and it has a little lidocaine in it to keep my dogs comfortable. I keep my Betadine in the truck, too.
I keep FortiFlora and Pro-Pectalin in my truck for when stomach issues inevitably arise. Both are available over the counter. FortiFlora (from Purina Pro Plan) is a powder probiotic for dogs’ bellies. It’s great for keeping them regular when they’re out there drinking pond water.
Pro-Pectalin comes in a tube, and it’s an anti-diarrheal. I keep it on hand for the same reasons as the FortiFlora. It’s a nuclear solution if they catch Giardia or another stomach bug.
Finally, I keep Benadryl and Neosporin cream in my truck for bug bites, allergic reactions, and other minor skin issues. Benadryl cream works great for insect stings and poison ivy.
I also keep Terramycin cream in my kit for eye issues. However, since it’s no longer available over the counter, hunters may find it more difficult to source as of 2025.
Final Tips for a Successful Hunt With Your Dog
When I get back to my truck after a good hunt, I always do what I call a “tailgate check”: I look carefully over my dog’s ears, eyes, nose, throat, and paws, searching for grass seeds, sticks, wounds, and any other anomalies. I also do a quick body check for impalements and cuts.
If my dogs sustained serious injuries in the field, I refresh their wrappings in the truck. Gauze and QuikClot come off; wounds get cleaned, reassessed, and redressed. Once everyone’s stable, it’s time to take them to the vet or head home for a well-deserved rest.
To cap this guide off, I have one last tip: do not buy a hunting dog first-aid kit from Amazon or any other big marketplace. They’re all trash. You’re better off assembling your own based on your local conditions.
A few good people make first-aid kits specifically for upland hunting, and I’ve seen them put to use in the community. Those may be worth a try.
If you want to buy a pre-assembled kit, do your research first. It may mean the difference between your companion returning from a hunt alive or dead. Your dog’s life is in your hands. Taking that responsibility seriously is part of our role as hunters and pet owners.
by Anthony Ferro, Experienced Hunter and Founder of Fetching Feathers